Saturday, November 15, 2014

Time to Buy Some Muck Boots

This is Chris, and this is my first time posting on our “Pepper-Yowell Adventures” blog. Mostly this has been an avenue for Mandy to post crafty things, food stuff, and misc. updates in our lives. I miss writing (blog posts specifically) and I thought this would be a great medium to talk about stuff. The good stuff. The bad stuff. The ugly stuff. Per most of what I write and share in my life, my goal is to be transparent, open, and honest, keeping in mind the need discretion on certain topics. So #herewego.

I titled this post “Time to Buy Some Muck Boots.” If you aren’t sure what those are, I’m not sure if we can continue being friends. Growing up, muck boots were the definition of hard, messy work. The question was not, “am I going to get dirty?” The question was instead, “how dirty am I going to allow myself to get in order to get the job done?” Would I be willing to get knee deep in mud to help out an animal, or reset a fence post, or fix a barb line?

Muck boots. They’re simple rubber boots that go over your legs to help you get less dirty. It is time for the Pepper-Yowell’s to buy some “muck boots.”

When Mandy and I first got together, like many couples, we had the discussion of how many kids we were going to have. That discussion also included the aspects of adoption. We were both on the same page going into our marriage of having one of our own and adopting the rest. Fast forward almost five years and the season of “starting a family” has become very prevalent. We can’t throw one of our cats right now without hitting a pregnant friend, or recently pregnant friend, or with babies under the age of two. They’re everywhere. Seriously. Everywhere.

I feel that every couple goes through that phase when they are first married, even at the wedding, when distant relatives, friends of the family, and some people that you don’t even know asking when you are going to start popping them out. It is as if there is this unspoken rule that in order to be “officially” married you have to get to work and start bringing in little replicas of you into the world. Who wants that?

Just kidding. I do. But that wasn’t something that we wanted when we first got married. We had enough of a time being married without children that we did not need to introduce a third wheel that would be 100% dependent on us. We were taking two single people, with single people problems, and putting them together under the same house, sharing the same bed, the same dishes, etc. After a while, many people continue to have those “single people” problems and to “fix” that they get the idea that having kids will solve their problems. For the wife, often times that fills their need for love (both giving and receiving) and for men…well…having kids means having sex. I’ll be frank. Many men think that sex is like a wrench for a relationship. The more you work it, the better things are.

Mandy and I were not one of those couples. We made the decision to be married, and be just the two of us, for a while. That probably sounds very selfish to a lot of people. Let me clarify by saying that I have nothing against anyone that had kids within the first few years (or months) of their marriage. I’m just being honest that it was not in our game plan. That brings us to the current day.

Mandy is finally out of school, we’ve gotten a little bit older, and have grown to be a little more mature (except when fry bread is involved, in which case I am basically a five year old). Now seems like a great time to start a family. We expected that. We had discussed for a long time of starting to have kids once Mandy became Dr. Pepper. What we did not expect was for the Heart Gallery to show up at our church and tear open our hearts.

Heart Gallery, if you aren’t familiar, is a bunch of pictures of adoptable kids currently in the foster system. Their story is generally attached to a headshot, and the pictures are set up to show people who these kids are and that there is a need to be filled. These kids need homes. These kids need families. Seeing their photos and videos for a month at church wrecked me, so Mandy and I finally decided that it was time to start getting some more information.

We went to an informational meeting, which was a panel of representatives from the different foster and adoption agencies around Lubbock and the South Plains. They started out talking about the different costs, what is needed in order to foster, the difference between fostering and adopting, all of which was information that I thought I knew but ended up not really knowing anything. Local and state fostering is nothing like the international stories that I had heard before. How naïve I truly was.

The meeting then got…gritty. I learned very quickly that it is not, as Rocky Balboa says, “all sunshine and rainbows.” Many people walk into fostering and adoption with this idea that everything is going to be awesome. There will obviously be a few hiccups here and there, but once they get their kid, everything is going to be perfect. The kid will be happy to finally be in a loving home. They will get everything that they truly need. You may work through a few issues, but nothing you can’t handle.

That’s not really reality. Not saying that it doesn’t happen or that it is not possible, but I learned that fostering and adoption is messy ministry. It is not all sunshine and rainbows.

I was naïve in thinking about the kids that are currently in the foster system. Everyone that I had ever talked about this subject had adopted a child that was either a newborn or less than one year of age. Sometimes it was from another country, such as China or Africa. I heard about the crazy adoption costs that they had to spend in order to get their child, but once they got them, everything seemed to work out like any other parents. Taking on children from other countries seemed so much nobler than kids in our own city. My thought was, “at least the kids in our cities have grown up with freedom.” How naïve I was.

1000. One thousand. That is the number of kids in the Panhandle region of Texas that are currently in need of foster homes. 700 of those are from Lubbock and Amarillo alone. That does not include the kids that are in foster homes, but have not been released for adoption because their cases are still in progress. There are 6000 across the rest of Texas. 6000 kids that are waiting to no longer have to sleep in an emergency shelter. 6000 kids that need a foster home JUST so that the chaos that has become their life can begin to become more “normal.” That is staggering to me. I heard these statistics in our foster babysitting training class this morning. What really amazed me that there were just over a half dozen people in the class. There were maybe two dozen at the church informational meeting a few months ago. I think there were more representatives from the agencies than people looking to get information.

How is this possible?

It’s messy ministry. Why would people want to open up their homes, their lives, and subject their family (especially their biological children) to messed up and broken kids? To some, it seems irresponsible to bring a drug addicted baby into their home. It seems irresponsible to bring a sexually abused boy into a place with other kids. They will abuse other kids and those kids will abuse more kids, and the cycle will never end. That’s what we’ve all been told. It’s messy. If it wasn’t, there wouldn’t be a need to take these kids out of their homes, up-turn their lives, and try to re-locate them into something better.

In the state of Texas there is a category known as “special needs.” This is not simply the traditional mental or physical needs that most of us think of. Special needs in Texas are in reference to the “undesirable” kids. These are the kids that no one really wants. In fact, the state of Texas has an incentive program just to get people to take care of these kids. You may think to yourself, “wow, how messed up are these kids?” Here are the qualifications to meet for special needs:

Minority over the age of two.
Any sibling group.
Any child with physical or mental disabilities requiring additional care.
Caucasian over the age of six.

That is a lot of kids, about 50% of the ones in the foster system. People don’t want these kids. That rips my heart wide open.

So…where am I going with this whole post? Where am I going with contributing to this blog in general? My goal is to provide Mandy and myself with an outlet to the world of what this process really looks like. Right now, we plan to adopt in the next few years, most likely a sibling group. But through starting this process, we’ve been hearing the same things over and over and over again. Foster parents need support. This is hard, difficult, exhausting, and often frustrating work.
Our avenue to start this adventure is with foster babysitting. This will probably be another post all in itself, but not just anyone can watch your kids when they are in foster care. They have to be trained, in babysitting, CPR and first aid. They have to pass background checks and get fingerprinted, and a few other things which cost money. You can’t just hire the teenage girl down the street. You can’t even ask your parents if they aren’t certified. That creates a lot of isolation and loneliness for foster parents.

Right now, that is one of the greatest needs. That is where we are going to start.

That’s it for now (I can go on for ages, but it’s time to click the publish button). I look forward to creating a dialogue with everyone that reads this blog and walking this journey with Mandy.


It’s time to buy some muck boots.

Saturday, July 19, 2014

Skirting the Issue

I follow a blog on Instagram called Simple Simon and Co and saw them post about Skirting the Issue, click the link for more information. I knew that I'd be spending some time with my family, and we're all big sewers so I thought why not take a day and sew some skirts! We did a different size for each skirt/dress so that when we donate these skirts to a local foster home they have one for every size girls to juniors. I'm going to add later the basic skirt pattern that we used to make the skirts, and photo's of us making them, but here are pictures of all the skirts!


Sunday, March 9, 2014

Stuffed Crochet Christmas Tree

Throughout this winter I've been going crazy crocheting things to keep myself sane. It's a great stress reliever and I love hand making things for people. Blankets have long since become boring for me unless they're for new babies so I have been trying new things. Stuffed animals, trucks, etc. thanks to this wonderful book called Cuddly Crochet by Stacey Trock. I added the light bar to the top of the truck, and changed the headlights because I was making it for a cop friend who drives a truck and I was trying to mimic it to the best of my abilities. The blue bird turned out much better than the red bird because it was my second time around so I learned what to do and what not to do. Ultimately my "nephew" loved the little birdie so it was a success!

I then decided to make a Christmas tree as a white elephant gift because it was easy and cheap and this was how it turned out:
I just thought it would be a cheap white elephant gift, the person that got it loved it and when I posted it on facebook my grandma then saw it and said she wanted one. So I decided to make bigger one and actually write down the pattern. Plus I had this super cute piece of fabric from a jar of bean soup that I thought would make a perfect "tree skirt." Grandma loved it and here's how it turned out:

Here's the pattern:

You are working in the round for this whole pattern so you will crochet in the back loops the entire time. It WILL help if you have a stitch maker to keep track of your rounds. If you don't have a fancy stitch marker you can use run of the mill safety pins to keep track of the end of your rounds so you know how far you've made it.
For the Tree:
Round 1: ch 2, sc 3 in 2nd ch from hook.
Round 2: sc 2 in each st.
Round 3: *sc 2 in next st, sc in next st, repeat from * 2 times.
Round 4: sc in each st.
Round 5: *sc 2 in next st, sc in next 2 st, repeat from * 2 times.
Round 6: sc in each st.
Round 7: *sc 2 in next st, sc in next 3 st, repeat from * 2 times.
Round 8: sc in each st.
Round 9: *sc 2 in next st, sc in next 4 st, repeat from * 2 times.
Round 10: sc in each st.
Round 11: *sc 2 in next st, sc in next 5 st, repeat from * 2 times.
Round 12: sc in each st.
Round 13: *sc 2 in next st, sc in next 6 st, repeat from * 2 times.
Round 14: sc in each st.
Round 15: *sc 2 in next st, sc in next 5 st, repeat from * 3 times.
Round 16: sc in each st.
Round 17: *sc 2 in next st, sc in next 6 st, repeat from * 3 times.
Round 18: sc in each st.
Round 19: *sc 2 in next st, sc in next 7 st, repeat from * 3 times.
Round 20: sc in each st.
Round 21: *sc 2 in next st, sc in next 5 st, repeat from * 5 times.
Round 22: sc in each st.
Round 23: *sc 2 in next st, sc in next 6 st, repeat from * 5 times.
Round 24: sc in each st.
Round 25: *sc 2 in next st, sc in next 7 st, repeat from * 5 times.
Round 26: sc in each st.
Round 27: *sc 2 in next st, sc in next 8 st, repeat from * 5 times.
Round 28: sc in each st.
Round 29: *sc 2 in next st, sc in next 9 st, repeat from * 5 times.
Round 30: sc in each st, fasten off with long tail

For the bottom of the tree:
Round 1: ch 2, sc 6 in 2nd ch from hook.
Round 2: sc 2 in each st.
Round 3: *sc 2 in next 2 st, sc in next st, repeat from * 3 times.
Round 4: *sc 2 in next st, sc in next st, repeat from * 9 times.
Round 5: *sc in next 2 st, sc 2 in next st, repeat from * 9 times.
Round 6: *sc in next 3 st, sc 2 in next st, repeat from * 9 times.
Round 7: *sc in next 4 st, sc 2 in next st, repeat from * 9 times.
Round 8: *sc in next 11 st, sc 2 in next st, repeat from * 4 times.
Round 9: *sc in next 4 st, sc 2 in next st, repeat from * 12 times.
Round 10: *sc in next 12 st, sc 2 in next st, repeat from * 5 times, fasten off with long tail.

For the ornaments (Not worked in the round, can use multiple colors):
ch 2, sc 2 in the 2nd ch from hook, sl st in 2nd ch from hook, fasten off with tail.

For the tinsel I used an old bead necklace, cut it, and slip it through stitches to hold it in place. Use the tail of the ornaments to sew them on around the tree randomly. Stuff the tree and use the long tails of the bottom of the tree and the tree to stitch the bottom onto the tree. If you have a cute piece of fabric you can just stitch that onto the bottom.

Friday, February 28, 2014

Nut Butter

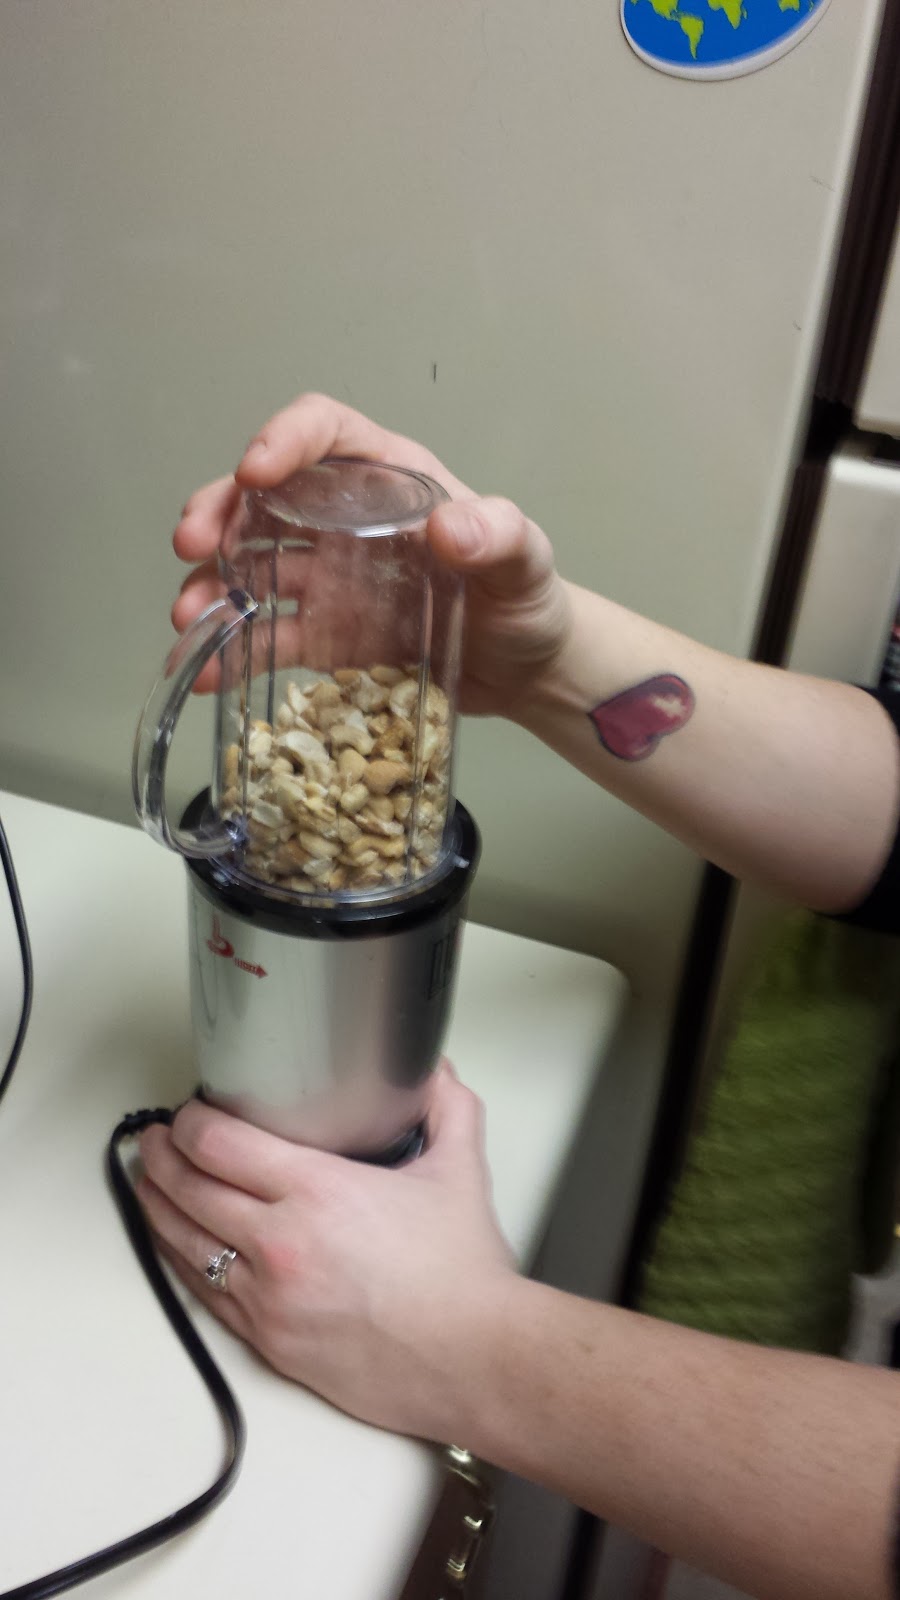
My parents destore  to surprise us and c  I doisit for about a week. Imicrowaveso nice to have someone actually come visit us in Lubbock! We went driving around Lubbock, seeing the sights, spending WAY too much money at Sprouts and other various locations. Mom had brought some homemade cashew butter with her and then ended up using almost all our peanut butter to make an amazing asian peanut sauce. All that toif you Ayotte it in the fridge, like I do, then you might want to microwave it for 20 -30 second to make it more  say we decided to buy some dry roasted, unsalted cashews and attempt to make some homemade cashew butter with my Magic Bullet (TM) because my mom had used her full size food processor and said that a small food processor would work better.


Doesn't just look so awesome! Don't worry I'll have the recipe below so you don't have to zoom in on the picture!

We took the dry roasted cashews and ground them in the magic bullet.


Then I suggest adding the salt and grinding one more time, especially if you chose to use any form of course salt. Then we added olive oil one-half tablespoon at a time, and honey one teaspoon at a time since we weren't sure how much it would take of either of them.
Then we ground it, add more honey and olive oil, ground it more, etc. until it became a thick paste, like peanut butter :-)

Then I scooped it into a half-pint jar, ready to be eaten and enjoyed!

I haven't tried almonds yet but that will be next and I will update the blog accordingly! Now that you've listened to me ramble on and have suffered through my amateur photographs here's the recipe:

Nut Butter

1 cup dry, roasted, unsalted nuts (choose any nut you would like, we chose unsalted so we could control the amount of salt in it)
1/2 t salt
2 t honey
2-4 T oil (peanut, almond, olive, vegetable, if you can stick with whatever nut you're using)

Blend or grind nuts in a small food processor or a magic bullet. If using sea salt or Kosher salt add after nuts are ground and blend or process again. Add honey and oil one teaspoon or tablespoon at a time and blend well. Add just enough oil to make it smooth, if you do more than one round as the blade gets hot it will be more doughy than buttery, just be prepared for that and don't over-add oil.

NOTE: If you store it in the fridge, like I do, then you will want to microwave it for 20-30 seconds before you use it to make it spread easier. Microwave without the ring and lid :)

Friday, November 1, 2013

Happy Fall Y'all!

Hey Y'all!

I'm super happy that it's fall and I had found some cute printables that said "Give Thanks" but I wanted to make my own that said "Happy Fall Y'all" and get some Texas spirit into the fall! I have made two different banners, one more simple, and one more complex and festive. I hope you enjoy!

Pictures to come!

Sunday, September 8, 2013

Befit Go Beach Body AKA Operation Bride

We have officially started Operation Bride for the majority of the bridal party for the wedding coming up in January. The Official schedule was posted by Lionsgate Befit on their Twitter account, but we couldn't find two of the videos so we put together a schedule with all the links to the videos!

Week 1
Day 1
Day 2
Day 3
Day 4
Day 5
Day 6
Day 7
REST
Week 2
Day 8
Day 9
Day 10
Day 11
Day 12
Day 13
Day 14
REST
REST
Week 3
Day 15
Day 16
Day 17
Day 18
Day 19
Day 20
Day 21
REST
REST
Week 4
Day 22
Day 23
Day 24
Day 25
Day 26
Day 27
Day 28
REST
REST
Week 5
Day 29
Day 30


Be aware that at Day 25 we may switch to Befit in 90, which is their version of P90X. So this will be our ramping up month and then I think we're going to switch to a much harder workout but it's way easier to follow because it tells you what videos to do for each day!

Enjoy!

Friday, July 26, 2013

Big Swiss Cake Roll

Mom and I stumbled across this pin and thought it was worth a shot.
We followed the directions and made the cake in a half sheet pan, using Reynolds Wrap new parchment paper that is half foil half parchment paper
After peeling off the Parchment paper we had to roll up the warm cake so that it would retain a memory of the roll shape. I used a sackcloth towel
 Little Miss Thang kept our cake safe and in shape while it was cooling!
While the cake was cooling we made the marshmallow creme filling
 Spread it out on the cake
 And rolled the cake back up!
Then we made the chocolate ganache, using mostly semi-sweet bakers chocolate, still following their recipe
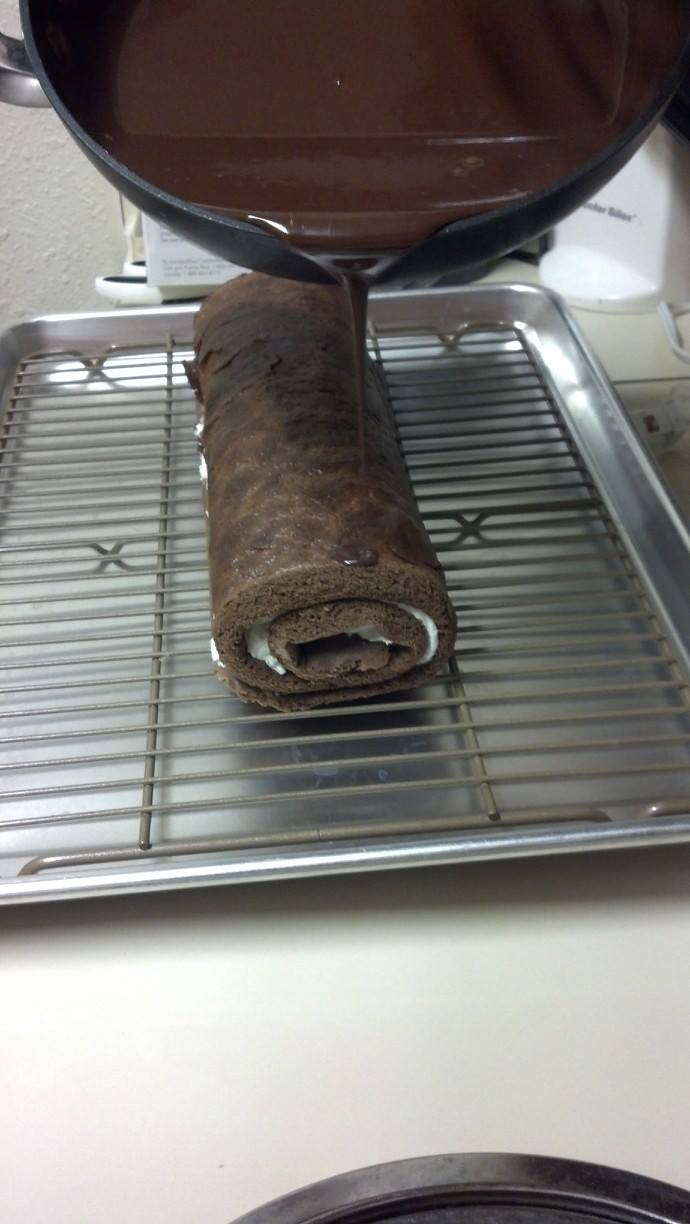
Then we covered the cake in the chocolate ganache
then cut it up and ate it:
We decided the cake was a bit dense and the ganache a bit bitter so we modified the recipe
We found a chocolate cake roll recipe in the Betty Crocker Bridal Edition Cookbook and decided to make that one, and we changed the ganache to include more milk chocolate.
 Then we cut it up and ate it. It isn't quite as pretty but it sure tasted yummy!
So here's the recipe to make the second Swiss Cake Roll:
Cake
4 Large eggs
1 cup granulated sugar
1/3 cup water
1 teaspoon vanilla
1 cup cake flour
¼ cup baking cocoa
1 teaspoon baking powder
¼ teaspoon salt
For dusting tea towel:
2 Tablespoons powdered sugar
1 Tablespoon baking cocoa

Marshmallow Crème Filling
1 Stick butter softened
¼ cup vegetable shortening
1 small (8oz) jar marshmallow crème
1 teaspoon vanilla
¼ teaspoon salt
1 cup powdered sugar


Chocolate Ganache Glaze
½ cup heavy whipping cream
2 Tablespoons salted butter
1/3 cup milk chocolate chips
1/3 cup semi-sweet chips
½ teaspoon vanilla
¼ cup powdered sugar

1.       Heat oven to 375. Line jelly roll pan, or half sheet cake pan, with parchment paper.
2.       Beat eggs in Kitchen-aid mixer on high speed about 5 minutes or until very thick and lemon colored. Gradually beat in granulated sugar. Beat in water and vanilla on low speed. Gradually add flour, baking cocoa, baking powder and salt, beating on medium just until batter is smooth. Make sure to scrape the sides of the bowl down and mix it in. Pour into pan, spreading evenly with spatula to corners.
3.       Bake 12 to 15 minutes or until toothpick inserted in center comes out clean/ Immediately loosen cake from edges of pan and turn upside down onto tea towel generously sprinkled with powdered sugar and baking cocoa. Carefully remove paper. Trim off stiff edges of cake if necessary. While cake is hot, carefully roll cake and towel from narrow end. Cool on wire rack at least 30 minutes.
4.       Prepare marshmallow crème filling:
a.       Cream together butter, shortening marshmallow crème, vanilla, and salt. Slowly beat in powdered sugar.
5.       Prepare Chocolate Ganache Glaze:
a.       Warm heavy whipping cream and butter in small sauce pan on low heat. Continuously stir in chocolate chips until melted. Add vanilla and powdered sugar, continuously stirring until combined.
6.       Unroll cake and remove towel. Spread marshmallow crème filling over cake evenly, to edges. Roll up cake. Place on a wire rack on top of baking sheet.
7.       Generously coat with Chocolate Ganache Glaze. Scrape extras off the baking sheet, re-warm if necessary and re-coat the cake roll.